I received this recipe from my dear friend Diana and it is now my go-to mulled wine recipe (Glühwii is Swiss for Glühwein, which is the German word for mulled wine). It is full of flavours and makes your home smell like your personal, cozy Christmas market. Enjoy!*Picture courtesy of standard.co.uk. To be replaced with my own soon!
3bottlesRed wine I found Primitivo di Manduria to be perfect for it. Otherwise Pinot Noir should be good for it as well.
200gSugarIf you like it very sweet, make it 250g
3cinnamon sticks
7cloves
6piecesstar anise
pinchground nutmeg
2oranges
1lemon
1apple
Instructions
Peel the oranges and lemon (make sure to get mostly the rind, but as little of the white part as possible). Cut the flesh of one orange into slices ( just flesh, none of the skin). Slice the apple, with the skin.
Put everything in a pot and warm it up for 15 minutes (do not boil it). Then let it rest for one hour.
Warm it again for 15 min, again without letting it boil. Ready!
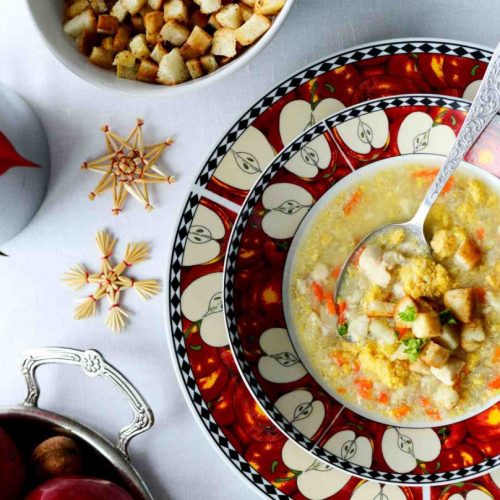
This is a variation of a traditional Czech Christmas Soup. Usually they make a fish broth for Christmas, which I find a bit weird (I can handle a chopped chicken floating around in a pot, but somehow not a chopped fish head). But this is a creamy version, with extra tanginess from the Sauerkraut, I absolutely love. It is an adapted version of a recipe given to me by a Czech mother, who put her heart and soul into cooking. All her good tasted like someone giving your stomach a huge hug — I hope you will enjoy this recipe. 🙂 *picture courtesy of resh.iprima.cz (I need to take a picture this Christmas 🙂 )
Cook everything except the fish and cream slowly, about one hour.
After one hour, In a small frying pan, melt butter about 4 tablespoons, and add sliced scallops, sauté only briefly, because it is easy to overcook it and then it becomes gummy. If you can’t get scallops, any mild fish or fish inards will do, just chop small pieces and sauté it in the butter briefly, adding ground pepper and then add to the soup.
Remove the bay leaf and the all spice as you find them. Bring the whole pot to boil, and slowly add cream while stirring, cook 1 minute and pull off the heat. You can use evaporated milk instead of cream, less fatty and less chance that it would curdle.
Season with ground pepper and salt if needed. The soup is best made ahead even few hours, so that the flavors can develop.
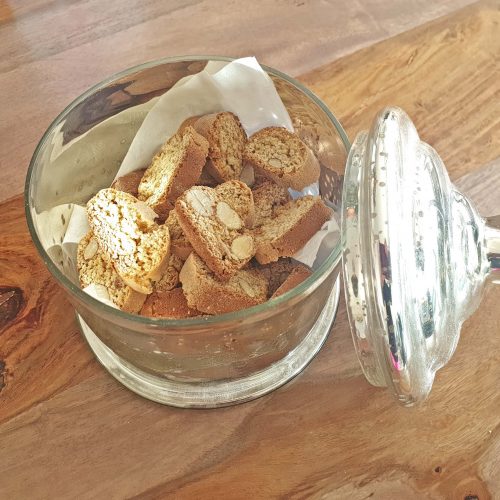
It took me many trial and errors to get these exactly the way I want. In Switzerland and Germany, there is a brand called Alnatura, which sells these. They happen to be quite expensive in Switzerland (like everything, really), so I wanted to try to imitate them. These are different from classical Italian Cantuccini, as they are less sweet and made with whole wheat flour. I personally prefer these over classical ones, even the original Cantuccini Fiorentini (I understand I made myself a lot of Italian enemies this very moment). Hope you like them!
Combine flours, baking powder, lemon and orange zest, salt, and mix well.
Whisk eggs, add honey, sugars, extracts, amaretto, and mix well.
Add flour mixture to wet mixture and mix until well combined, but still a bit crumbly. Add the almonds, mix it in well. At this point, put the dough mixture on a floured surface and knead until the dough is smooth. Add some more flour, if needed, but make sure it does not end up too dry.
Divide the dough into 4 parts and roll them into logs that are approximately as long as the baking sheet, and about 2.5 cm wide.
Cover your baking sheet with parchment and add the logs. Flatten them slightly, so that they can take on their lengthy form. Place them in the oven for approximately 25 minutes.*
Remove the baking sheet from the oven and reduce the temperature to 160° C.
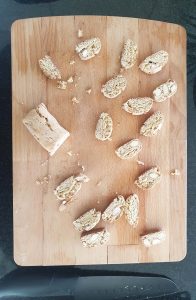
Place the logs on a cutting board and using a sharp knife, cut it diagonally into slices, about 1.5 cm thick.
Put the slices back on the baking sheet and back in the oven for about 5 minutes** per side.
Notes
* I do not like things very sweet, so for some of you, this might not be enough sugar. I saw Italian recipes calling for 150 g of sugar, and some Americans for 165, to give you some idea. The Italian “proper” recipes I saw do not have honey in it, so perhaps something in between makes sense. The honey makes them more flavourful and slightly less dry to me. ** It took me a lot of trials to get the timing right. You want it to be entirely cooked on the inside and brown on the outside, but not too brown. If you take them out, I suggest cutting one log in half and checking whether the inside is still a bit raw. If that’s the case, stick it back to the oven for another 5-10 minutes. *** I tried to leave it in the oven shorter and longer, and my boyfriend and I had some disagreements here. He preferred the version with 2.5 minutes baked on each side, me the one 5 minutes – it makes it more crunchy, which to me Cantuccini should be. You can try two batches and compare.
This year, I finally decided to get my teeth straightened.
I had worn removable aligners as a kid, but given my lack of will-power, I did not wear them consistently enough and my teeth never got straight 100%. This has been bothering me for the last 10+ years (#firstworldproblems).
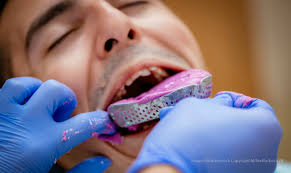
So, in December 2020, I had my first appointment at the dentist to make all the scans and begin an Invisalign treatment. Invisalign is a custom-made orthodontic system for your teeth, consisting of a set of clear “invisible” and removable aligners. Each week, you receive a new set that gradually helps move your teeth into the desired place. Since I did not want to get old-school braces and look like a 30-year-old Darla in Finding Nemo, Invisalign seemed like a good option.
After the second appointment in January, I walked home with my first set of clear aligners in my teeth, designer-looking Invisalign package in my hands, and disconcertment in my spirit, due lack of information. How does this technology work? How is the teeth trajectory calculated? How accurate is it? While I love my dentist (because he is competent, NOT because he happens to be quite handsome), I did not really get any helpful background information, except for a beautifully marketed Invisalign flyer, informing me that “A lot of powerful technology and doctor’s expertise combine to make a digital plan for shaping your new smile.” 1https://www.invisalign.com/how-invisalign-works/treatment-plan What a great marketing pitch. But what exactly is the “powerful technology” behind it? I decided to investigate a bit.
The Technologies
There is not one technology behind Invisalign, but several. The treatment starts with portrait pictures of your smile, which serve as basis for a 2D facial analysis (or “smile” analysis). I will talk about this step a bit more in the next section.
The dentist will then make a scan of your teeth, using the iTero element® scanner. It’s a fancy name for a 3D scanner, based on 3D reconstruction technology coming from the fields of computer vision and computer graphics.2Fun fact: Disney is behind some of the research in teeth reconstruction. Perhaps they want their employees to have as straight teeth as their movie characters? https://la.disneyresearch.com/publication/model-based-teeth-reconstruction/ This technology is based on 2D images: for Invisalign, a hand-held scanner is used, literally stuck in your mouth and moved around. This method is called intraoral digital dental impressionscan.
Picture from Wu et al.’s ACM SIGGRAPH Asia 2016 presentation 3https://pdfs.semanticscholar.org/90e0/b93e049509bf9058206cce945a4cc2fcc150.pdf
It replaces the old-school mold that they used to stick into your mouth, making you gulp for air (though it has been shown to be less accurate than digital impressions made from such casts4See Flügge et al., 2013).
Do they still torture people with those? 5 Picture from https://www.dentalproductsreport.com/view/10-golden-rules-taking-impressions
The method used by the scanner is called parallel confocal imaging, another fancy word, which means that thousands of points of laser light are used to trace, capture, and reconstruct the shape of your teeth.
Doing all of this is not a trivial step: the technology needs to accurately capture your teeth geometry and the gingiva (the junction between your gums and teeth), to be used as basis for planning the treatment plan. It also needs to “guess” where your roots are, since they are not visible. According to a 2003 paper6See Beers et al., 2003 on Invisalign, this step is (or was) done, using simple statistics7A linear model, likely a regression, is fit using four teeth properties, and a cost function is used to find the best fitting model..
I say this step was done this way, as I imagine newer methods are used these days, possible using more advanced methods, that take into account more properties of your teeth and mouth. In the picture below, for instance, you can see a method from 2016, which uses image recognition on a simple picture (no 3D scan), to trace your teeth. Clearly things have been moving since 2003.
Picture from Wu et al.’s ACM SIGGRAPH Asia 2016 presentation8https://pdfs.semanticscholar.org/90e0/b93e049509bf9058206cce945a4cc2fcc150.pdf
So, the first important step is to create an accurate model of your teeth.
Next, an algorithm is used to calculate the perfect position of your teeth and the difference between the current and perfect state. This is done (according to Invisalign) using their ClinCheck® software. What is behind this software? Invisalign’s website tells us, “The algorithm helps calculate just the right amount of force for every tooth movement”, “The software, with input from your doctor, helps ensure every tooth moves in the right order and at the right time” and the whole thing is “Powered by data from 9 million smiles.” Let’s dig a bit deeper.
“Beauty is in the eye of the beholder” – but who exactly is the beholder?
The first important question to ask is: How does whoever programmed the software (or even the dentist) know, what the teeth formation should ideally look like? What is the “right” amount of movement? What makes the teeth aesthetically pleasing? Zimmerman and Mehl (2015) write in their survey:
“Redesigning the appearance of the anterior [front] teeth in the smile design process is a demanding task, first, because this changes the patient’s smile characteristics and, second, because the esthetic wishes of the patient must be accommodated within the predetermined functional, structural and biological framework.”
Sounds quite complicated. So how does Invisalign accomplish this?
The paper I mentioned from 2003, which gives details on the Invisalign process, does not give a very satisfying answer to this question, except saying that the teeth are placed in “a clinically and esthetically acceptable final position.”9 see Beers et al., 2003 Creating the perfect smile seems to not be an exact science – according to another paper from 2006, “Many scientific and artistic principles considered collectively are useful in creating a beautiful smile.” 10See Davis, 2007 Let’s have a look at some examples.
Aesthetic Principles
As mentioned earlier, my treatment started with a picture of my smile. To be honest, I originally thought there is some trivial reason for this – perhaps they liked my face and have some sort of internal hall of fame for best smiles achieved. Well, likely that is not the reason, because while researching I came across something called Smile Design. These days, there are many guidelines to achieving a “perfect” smile, and profile pictures provide valuable input to achieve a person’s smile goals.
Bottom is deemed as more aesthetically pleasing, as the gums are not showing (picture from Davis, 2007).
There are several available systems that have been developed for this purpose, one of which is called Digital Smile System (DSS). A look on their website confirmed that they teamed up with Invisalign.11https://digitalsmiledesign.com/planning-center/dsd-and-invisalign-tps
Four main parts are likely analysed from the pictures: the lipline, the “smile curve,” the shape of your teeth, and certain facial features, such as height and width.
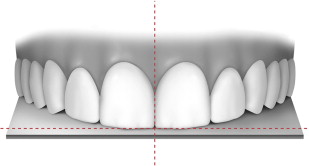
Your teeth midline should be centered, as a distorted midline is deemed unaesthetic (picture from Davis, 2007)
Scientific Principles
Of course, your smile is not the only thing that is important. By creating a 3D model of your teeth, roots, and gums, the system can also determine what is feasible and what is not. For instance, teeth can only move two ways, by translation or rotation (or a combination). Furthermore, force needs to be applied by taking into account the center of resistance of a tooth. This is similar to the center of gravity from physics: every object has one point, at which it can be balanced, and movement depends on the line in which force is exercised to this point.
My boyfriend and I, trying to move the center of gravity of the tower of Pisa. In case you every wondered why the thing is not falling, knowing about centers of resistance should help you understand.12 https://leaningtowerpisa.com/facts/why-pisa-leaning-tower-does-not-fall
To summarise: Invisalign uses aesthetic and scientific principles, just like an orthodontist would, and likely examples of previous outcomes (given they have data from 9 million smiles) to create a realistic “goal” model of your teeth.
Movement Planning
Once we have a model of the existing teeth and a model of the ideal teeth position, it is time to calculate how to get from A to B. The process is called Movement Planning. Movement planning is done, by taking into account how force should be applied, to make each tooth move in the desired way. Importantly, Invisalign aligners can only push, not pull, which needs to be taken into account.
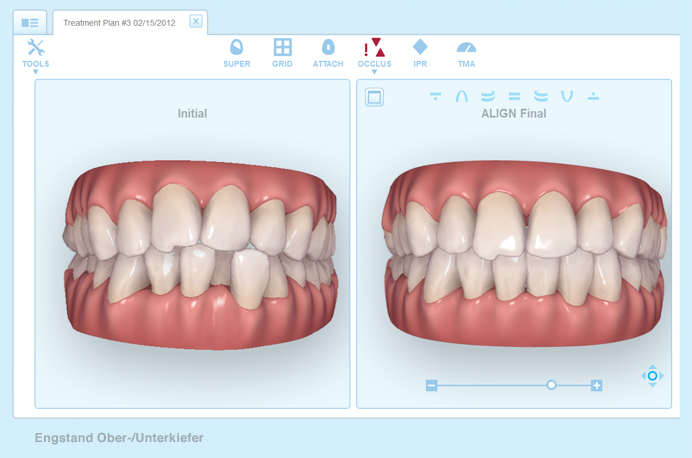
Example of a initial and goal model of teeth.13 image taken from https://perfect-smile4u.de/blog/blick-in-die-zukunft-in-echtzeit-clincheck-pro-von-invisalign/
Likely, the software calculates several paths of how to get there, and a clinician or the dentist chooses the best path.
A set of intermediate steps are calculated, which the teeth have to reach with the weekly changing aligners. Invisalign’s software outputs the treatment plan with all the intermediate steps, which the dentist can view and modify, if he or she thinks the teeth will not move the desired way. In the end, virtual planning is not the same as actual, physical planning by a dentist. Nevertheless, many companies are trying to minimise the contact with the dentist, to minimise costs, and leave things up to the software.
Using another technology called SmartStage, the set of aligners are then produced and 3D-printed.
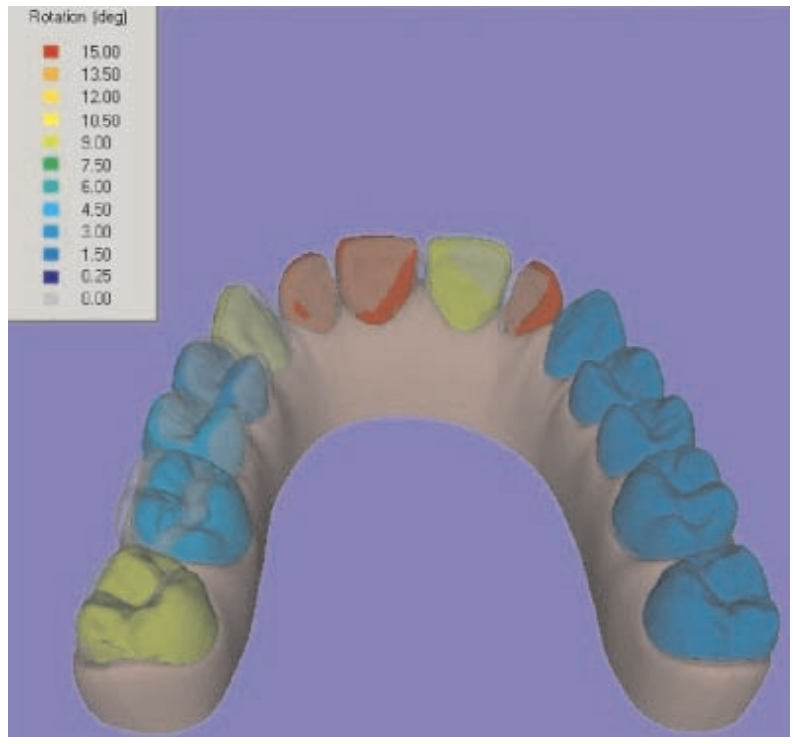
Outcome Analysis
The last part of the process is to make another scan of your teeth and compare the result with the desired result (I have not yet reached this point).
Picture taken from Beers et al., 2007. The colours show differences in expected and actual treatment outcome.
If you actually wore your aligners the recommended 20-22 hours per day, your teeth should now be perfect, your smile bright and wonderful, so you can live happily ever after. Right?
The Bad News
Invisalign was introduced in 1999 by the U.S.-based Align Technology, a manufacturer of 3D digital scanners 14Although they are by no means the first to have the idea of an “invisible” aligner; the first was already introduced by Ponitz in 1971. However, the first scientific clinical study to evaluate its effectiveness was not done until 10 years later, in 2009, after a 2005 systematic review showed that no adequately designed studies could be found and therefore no scientifically valid claims could be made on treatment effect of the aligners.
Subsequent studies, such as by Kravitz et al., 2009 showed that there were significant differences between the proposed virtual results and the actual clinical tooth movements, in some cases showing less than 50% accuracy in the movement. One study from 201515See Hennessy & Al-Awadhi, 2015 concludes by saying:
“Clear aligner clinical usage has not been matched by high-quality research. Until these data become available, these appliances will continue to be viewed with a degree of scepticism by many orthodontists”
A systematic review from 2018 found that only 3 of the 22 surveyed studies showed a low risk of bias, and concluded by saying:
“Despite the fact that orthodontic treatment with Invisalign® is a widely used treatment option, apart from non-extraction treatment of mild to moderate malocclusions of non-growing patients, no clear recommendations about other indications of the system can be made, based on solid scientific evidence.”16See Papadimitriou et al., 2018
The latest research I found, a paper starting with “Has Invisalign improved?” in the title, from 2020,17See Haouili et al., 2020 concludes that it did improve a bit (i.e. now more around 50% accuracy, yay…), but “Despite the improvement, the weaknesses of tooth movement with Invisalign remained the same.”
You can imagine me at this point in my research, aligners in my mouth, nervous twitch on my face, wondering why I did not think of checking all of this before starting the treatment…
…like so.
The Good News
Apparently there were several generations of aligners and the third one got things a bit more right. All of it has to do with how force is applied to your teeth and if that force reaches the center of resistance of each tooth, which is the only way to achieve movement. Removable aligners cannot reach this center of resistance easily, so attachments came to the rescue. Attachments are basically like clear versions of regular brackets, that are glued to your teeth, which nowadays are automatically added by the software in certain cases, like derotations and root movements.
Picture of the teeth of a Reddit user, with attachments on each tooth.
The funny thing of course, is that if you need attachments on every tooth, there is no more big difference between regular brackets and Invisalign in terms of aesthetics, since nowadays regular fixed ceramic brackets can be quite “invisible” as well (no more metal toolbox in your mouth).
But for some more good news: Most papers seem to agree that “light” cases can be successfully treated with Invisalign, and the dentist should also let you know from the beginning, if your case is treatable using this system, or requires the old-school brackets. Since I have the Invisalign Lite version (only minor changes to the front teeth), I should be a very light case (I am more talking to myself, at this point, to help me feel confident).
I recently had to go back to the dentist to get my attachments added. While the first few weeks were easy-peasy, the attachments take some getting used to. I will update this article, once my treatment is complete and add my own experience.
*** UPDATE ***
I am done with my treatment and the outcome is impressive! So, forget everything I said before. Just kidding, here are a few take-aways:
Teeth tech is cool.
It’s all about attachments — without those, things will not move the way they should, and of course Invisalign’s ads will not show you that attachments are not as comfy-invisible as just trays.
After your treatment, you might need an after-treatment of a few weeks (I needed 5 extra weeks) to fix small last issues, which prolongs the whole endeavour.
After the after-treatment, in order to prevent your teeth from going back to before, you need to a) wear a last pair of trays over night for life, or b) get some wires put in for life. I chose the latter and can tell you, they take some time getting used to (it probably took me 4 weeks to stop being aware they are in my mouth).
Is it worth it? Absolutely. I am extremely happy with the outcome and have received compliments on my beautiful straight teeth. 🙂
References
Beers, A., Choi, W., & Pavlovskaia, E. (2003). Computer-assisted treatment planning and analysis. Orthodontics & craniofacial research, 6 Suppl 1, 117-25 .
Flügge, T.V., Schlager, S., Nelson, K., Nahles, S., & Metzger, M. (2013). Precision of intraoral digital dental impressions with iTero and extraoral digitization with the iTero and a model scanner. American journal of orthodontics and dentofacial orthopedics : official publication of the American Association of Orthodontists, its constituent societies, and the American Board of Orthodontics, 144 3, 471-8 .
Haouili, N., Kravitz, N., Vaid, N.R., Ferguson, D., & Makki, L. (2020). Has Invisalign improved? A prospective follow-up study on the efficacy of tooth movement with Invisalign. American journal of orthodontics and dentofacial orthopedics : official publication of the American Association of Orthodontists, its constituent societies, and the American Board of Orthodontics.
Hennessy, J., & Al-Awadhi, E. (2016). Clear Aligners Generations and Orthodontic Tooth Movement. Journal of Orthodontics, 43, 68 – 76.
Lagravère MO, Flores-Mir C. The treatment effects of Invisalign orthodontic aligners: a systematic review. J Am Dent Assoc. 2005 Dec;136(12):1724-9. doi: 10.14219/jada.archive.2005.0117. PMID: 16383056.
Liping Zheng; Guangyao Li; Jing Sha (2007). “The survey of medical image 3D reconstruction”. Fifth International Conference on Photonics and Imaging in Biology and Medicine. Proceedings of SPIE. 6534. pp. 65342K–65342K–6. doi:10.1117/12.741321. S2CID 62548928.
Papadimitriou, A., Mousoulea, S., Gkantidis, N., & Kloukos, D. (2018). Clinical effectiveness of Invisalign® orthodontic treatment: a systematic review. Progress in Orthodontics, 19.
Kokich, V., Kiyak, H., & Shapiro, P. (1999). Comparing the perception of dentists and lay people to altered dental esthetics. Journal of esthetic dentistry, 11 6, 311-24 .
Kravitz, N., Kusnoto, B., Begole, E., Obrez, A., & Agran, B. (2009). How well does Invisalign work? A prospective clinical study evaluating the efficacy of tooth movement with Invisalign. American journal of orthodontics and dentofacial orthopedics : official publication of the American Association of Orthodontists, its constituent societies, and the American Board of Orthodontics, 135 1, 27-35 .
Smith, R., & Burstone, C. (1984). Mechanics of tooth movement. American journal of orthodontics, 85 4, 294-307.
Zimmermann, Moritz; Mehl, Albert (2015). Virtual smile design systems: a current review. International Journal of Computerized Dentistry, 18(4):303-317.
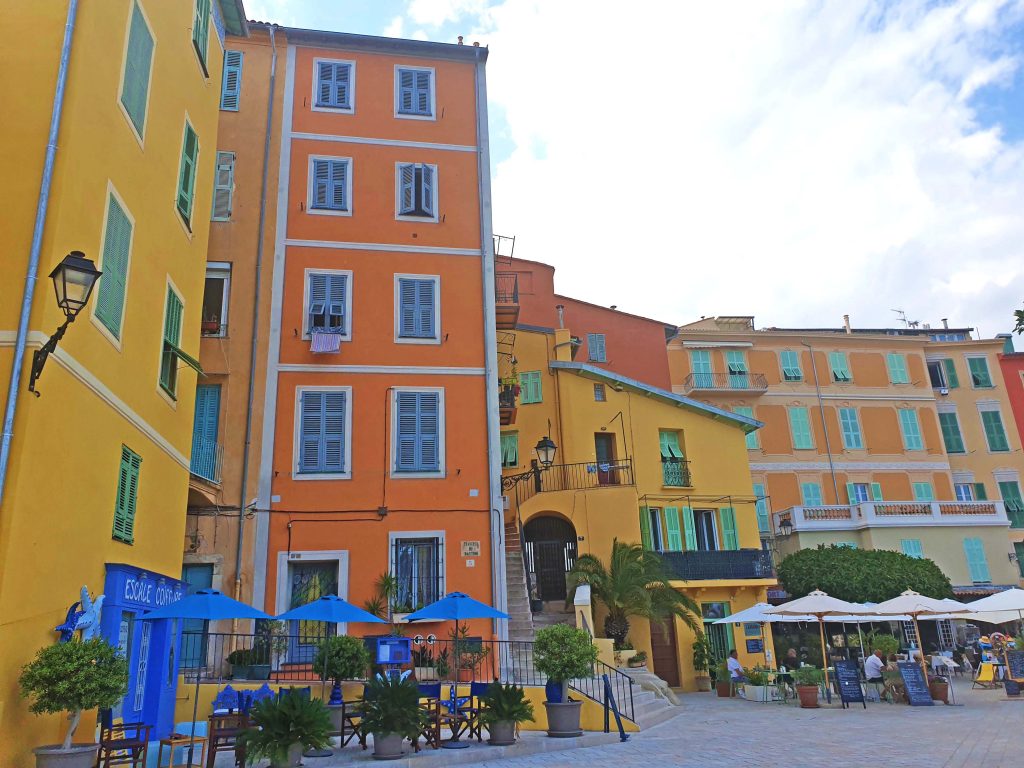
…then you are probably in an amazingly beautiful place called Menton!
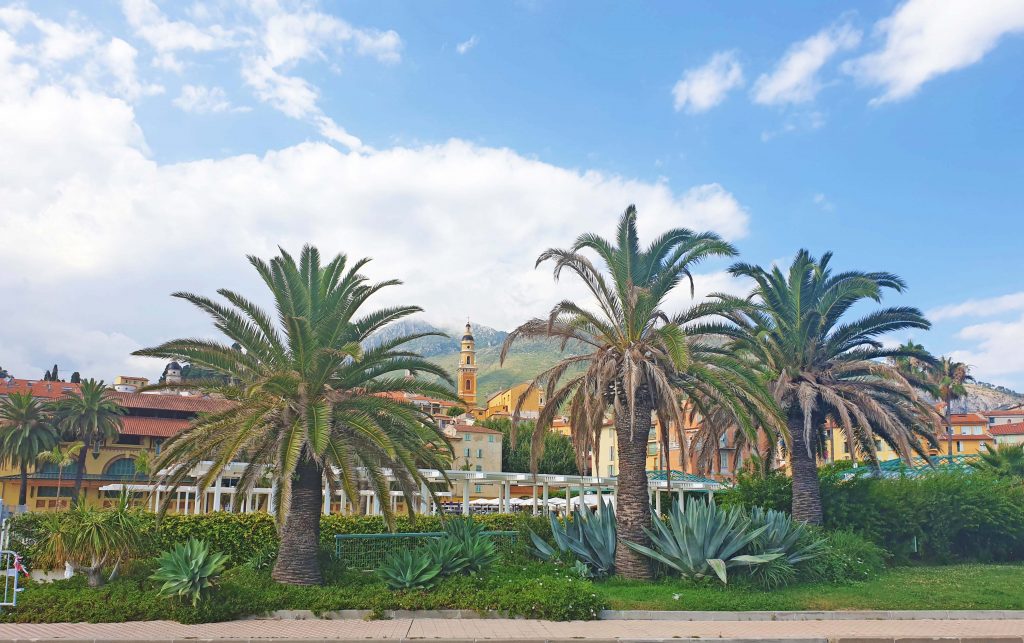
When I visited Menton for the first time in 2020 (when Covid19 gave us a short, deceivingly hopeful-looking break), I was positively mesmerised. The place is simply beautiful! The pastel colours everywhere, the palm trees, the happy people, the sunny blue sky and landscape…I fell in love immediately.
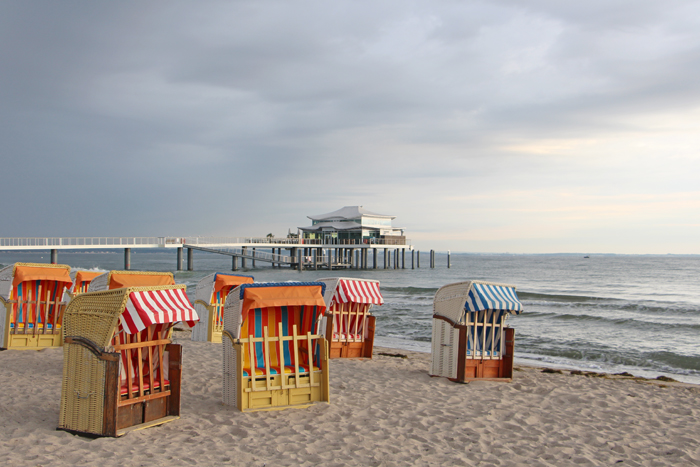
It reminded me a bit of the first time I ever visited a “proper” beach. As I grew up in Hamburg, most of my childhood I would visit the Northern beaches in Germany, and for the longest time I thought, beaches are quite cold and windy places, with funny chairs everywhere, where spiders or other bugs could safely hide. Once I went on a pre-school trip to the German Island Föhr, where it was raining the whole trip, so we had to bundle up with raincoats and rain boots and play in the cold, wet sand. I delegated the task of making sand castles to my classmates, which apparently displeased the teacher (though I don’t remember her touching the sand, either!).
My memory of beaches in Germany.1picture from https://www.schoensten-orte.de/timmendorfer-strand-urlaub-an-der-ostseekueste/
To be fair, I have of course had many fun times as a child, no matter how cold the water, because even German sand can be turned into cool shapes. Also, my parents would usually treat me for lemony ice-cream, which made my day.
Me arriving in Saint Tropez
But I distinctly remember the time, around age 9 or 10, when I went on my first vacation to the Côte d’Azure, with my aunt, uncle and cousins. I remember arriving in Saint Tropez, sunny blue sky, palm trees everywhere, putting my feet in the water, and thinking: Arnaque! (French for “I have been scammed with a fake beach all these years!”)
I believe around that time I also developed a strong sensation of clearly having been born in the wrong place. Or of thinking, humanity in general had made a mistake, because why would anybody live in the North, when one can live in such a beautiful, colourful, sunny place?
Although I have not set foot on a German beach in over a decade, arriving 20 years later in Menton made me remember, why I thought this.
Road Trip
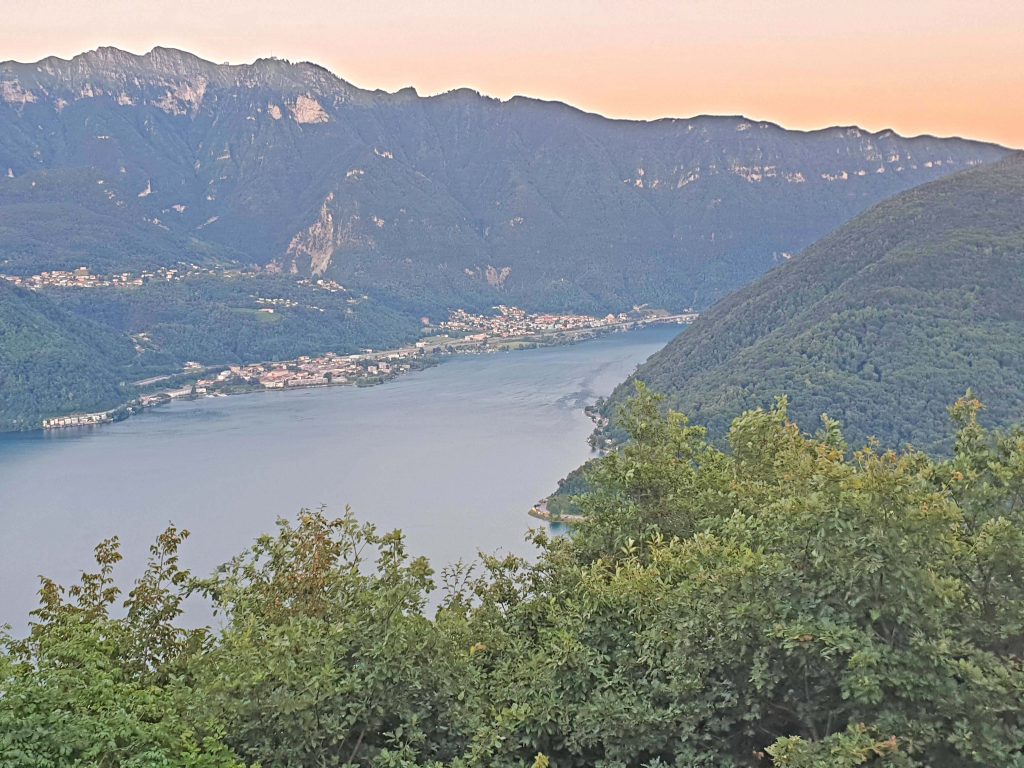
Since the Covid situation was looking reasonable, but unstable at the time, my boyfriend and I decided to take the car and drive from Switzerland to the South of France. The trip itself was extremely beautiful, as we passed through the Swiss mountains, and through parts of Italy, where we got gorgeous views of Lake Como in Lombardia, Tuscan-looking landscapes in Southern Lombardia, and the Coast of Liguria, home of the famous Cinque Terre (which is still on our bucket list!).
Arriving in Nice
We first arrived in Nice, where we stayed in a holiday apartment with an incredible view. Nice is a vibrant city in the French Côte d’Azur and seventh biggest city of France. What I love about Nice is the big-city feeling mixed with the laid-backness of the South. When you go for a walk around the streets, you often discover unexpected gems, little cafés or shops, filled with bright patterns and colours.
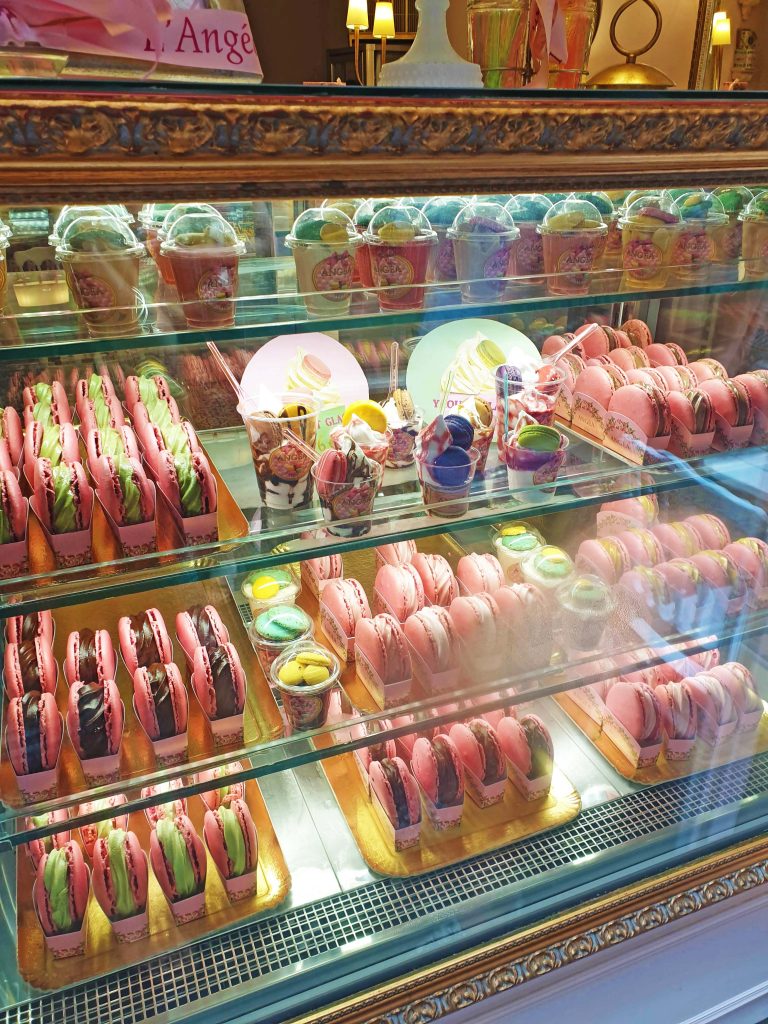
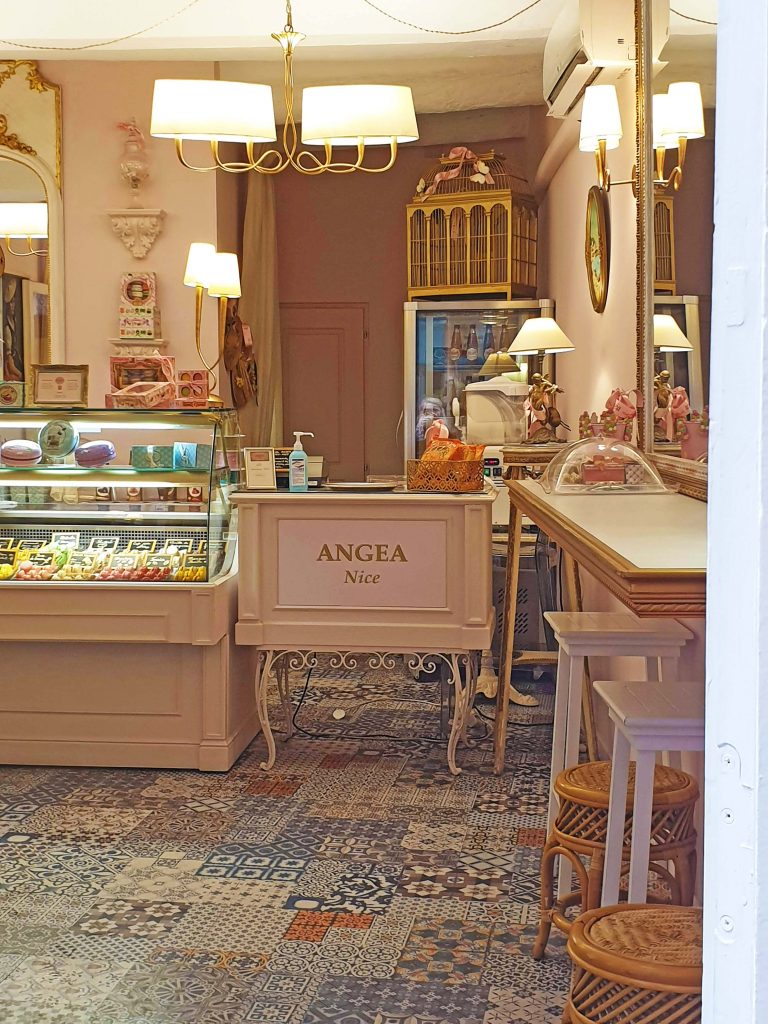
Angea Les Macarons in Nice: Macarons filled with ice cream. Need I say more?
What I don’t love about Nice is anything on wheels. Driving in Nice is just a disaster. The worst is, YOU are the thing that is wrong in that traffic, because likely you are trying to follow rules, and that just doesn’t work there. People in Nice seem to have some internal agreement on how to collectively understand the chaos. Scooters slalom and zigzag through traffic, there is no sense of priority, all fend for themselves.
But well, I guess that’s a less charming side-effect of the otherwise charming city. Afterwards, you can just go to Hobo Café in Nice: extremely good coffee, extremely good Sangria, extremely handsome waiters, makes up for all the traffic in the world.
Happy Diego and his Sangria. Although he didn’t like so much the handsome waiter.
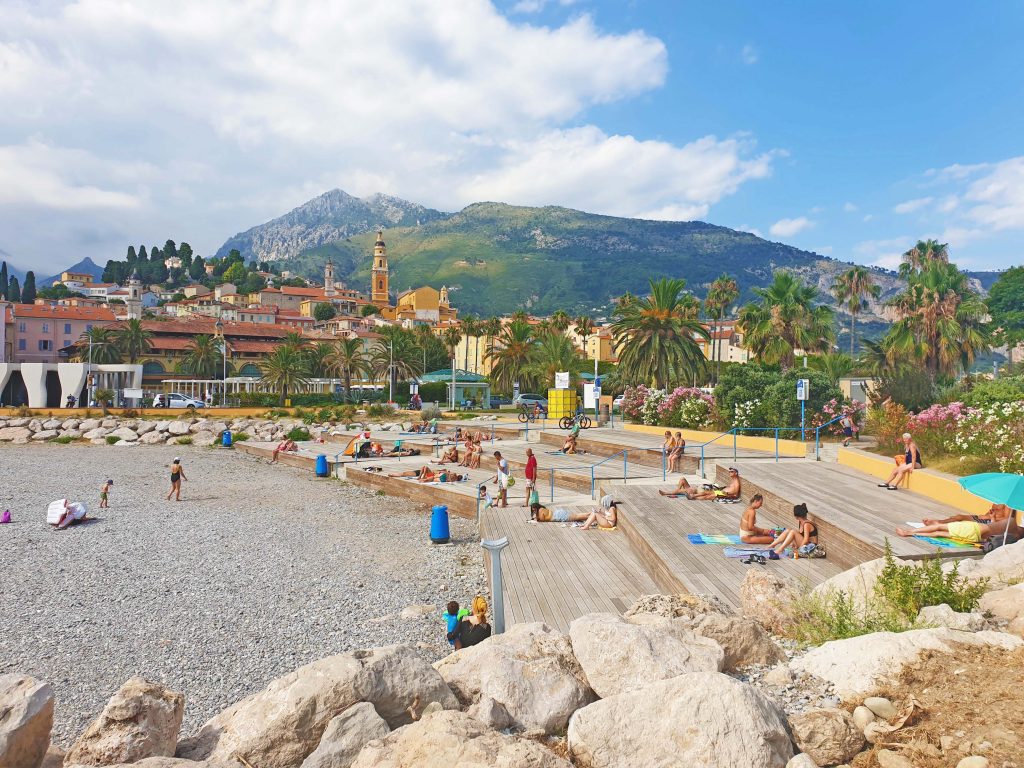
Menton
Only 30 minutes by car east along the coast, after passing through Monaco, at the border of Italy, there lies beautiful Menton, the city of lemons. Known for their yearly Fête du Citron (lemon festival) in February, this city is so bright and happy, I could not help but walk around the whole day smiling.
You can easily see the old town and harbour in one afternoon, which means you can take some time to enjoy the place and the sheer vibrance of the houses.
As Menton is in a perfect geographic location to cultivate lemons, they are extremely juicy and fragrant, and therefore the jewel of the Côte d’Azur. Lemons are everywhere in this city, in desserts, in oils and soaps, posters, even the Menton Flag has lemons in it.
Speaking of desserts – one of the best desserts to make with lemons is the Tarte Meringuée au Citron and that is just what I did, when I got home from this trip. If you would like to get a bit of Menton feel at home, check out my recipe. You will have a smile on your face once you eat it, like us the whole time we were visiting the Côte d’Azur!
Got any recommendations for things to see/eat/drink? Leave a comment below, I will make sure to try during my next visit (hopefully in 2021!)
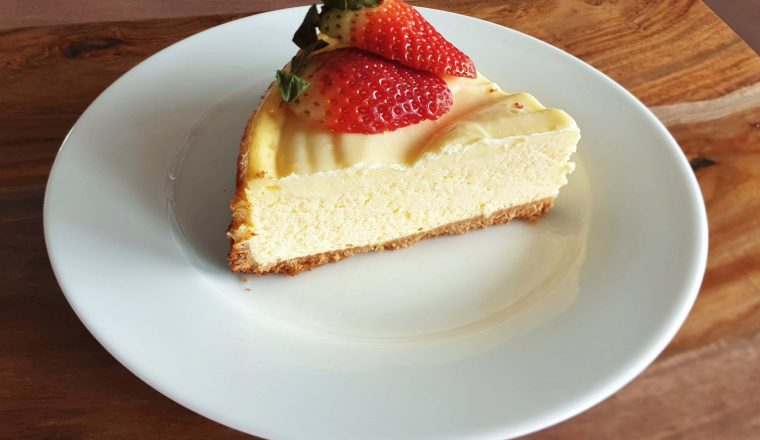
My go-to New York-style cheesecake recipe. Simple, creamy, delicious. This is the basic recipe I use, and the possibilities for flavour variations and toppings are endless! You can make half the filling of the Lemon Tarte or just pour caramel sauce on it. I once made a Thanksgiving version of it, where I simply mixed half of the filling with pumpkin purée and gingerbread spice. I also made it chocolate-y once. But it seems, the basic one still has the most success. Enjoy!
900gPhiladelphia cheesemust be full fat, *see note
120mlsour creamcan be substituted by heavy cream
4eggs *see note
1egg yolk
zest of one lemon
200gsugar
1tbspMaizena (cornstarch)
1packagevanilla sugar
Crust
250gground Plazma cookies*see note
65gmelted butter
Instructions
To make the crust
Preheat your oven to 180°C (350°F). Wrap the bottom of a 23-cm springform pan with a baking sheet.
In a medium bowl, mix together the ground biscuits and melted butter. Mix until all is combined – it should look a bit moist. Press the mixture into the bottom and half way up the sides of the prepared pan to form an even layer of crumbs.
Bake for 8-9 minutes until golden brown. Allow to cool completely on a wire rack. Meanwhile, prepare the filling.
To make the filling
Lower temperature to 130°C (260°F)
Use a hand mixer or kitchenaid with paddle attachment to beat the cream cheese on low speed until smooth and lump-free, 1-2 minutes. Add sugar, vanilla sugar, cornstarch, and pudding powder, and beat until blended. Scrape down the sides and bottom of the bowl as necessary. Add the eggs, one at a time, and beat until fully combined. Add sour cream and lemon zest and beat just until combined and smooth. IMPORTANT: The goal is NOT to overmix and add too much air (you will see small air bubbles if you do), but also not to undermix and not have things evenly incorporated. In both cases, the cheesecake will not come out as creamy as it should. Trust me, I had to learn the hard way.
Pour batter over cooled crust and spread evenly.
Bake the cake for 60 minutes (start checking it after 45 minutes…it should not be dark on top and there should not be cracks, in which case its overbaked). Turn off the oven after the 60 minutes and set a timer for 10 minutes. After the 10 minutes are over, slightly open the oven door and leave it in for another 10 minutes (this will prevent the cake from cracking). The sides should be set, but the center still wobbly at this point. If your kitchen is very cold, you might need to increase both of those times.
Transfer the cake to a wire rack and allow it to cool to room temperature. Cover the cake with plastic wrap and refrigerate overnight or for at least 6 hours.
Notes
*Important: eggs and milk products need to be at room temperature, otherwise your cheesecake will crack in the oven. Basically this cake is like a new-born baby, it will scream, if you expose it to sudden changes in temperature.**Biscuit ground: the original New York cheesecake is made with ground digestive biscuits. I found the ground Lane (or Serbian Plazma) cookies which they sell in Switzerland at Migros/Coop to be perfect, no added sugar or anything required. But feel free to buy digestive cookies and grind them up, the butter amount should stay the same, perhaps just some added sugar is needed.***The Philadelphia cheese needs to be full-fat. I tried with low-fat and it just is not the same, it ends up more spongy than creamy. So if you are a health-conscious person, you just have to sit down, have a conversation with yourself, agree that life is short, put that conversation into a box in your brain. Then go make the cake with 900g full-fat Philadelphia.
Wholesome, healthy pancakes, naturally sweet. I originally found these at Brunch & Cake in Barcelona and then went for a recipe hunt to incorporate them into our brunch regulars. I found a recipe over at Lorraine Elliott's page, which comes pretty close. Apparently her recipe is adapted from this one at Pinch and Swirl…so the recipe has been evolving and you can try different versions and pick which one you like best. 😉 Sadly Brunch & Cake stopped making these, otherwise I would tell you to take the next [flight/train/car/bus/Lime] and go there immediately to try their delicious version. I only made minor adaptations.
1/2cupmilkI use coconut milk. Buttermilk also works like a charm.
1/2 cupricottaYou can substitute greek yoghurt or quark.
2medium ripe bananasYou can use one, but I enjoy the banana taste.
3-5Medjool dates*see note below
2eggs
1pack vanilla sugaror Vanilla aroma, if you prefer not to add any sugar.
Instructions
Put all the good stuff in a blender and blend, blend, blend until beautiful and smooth
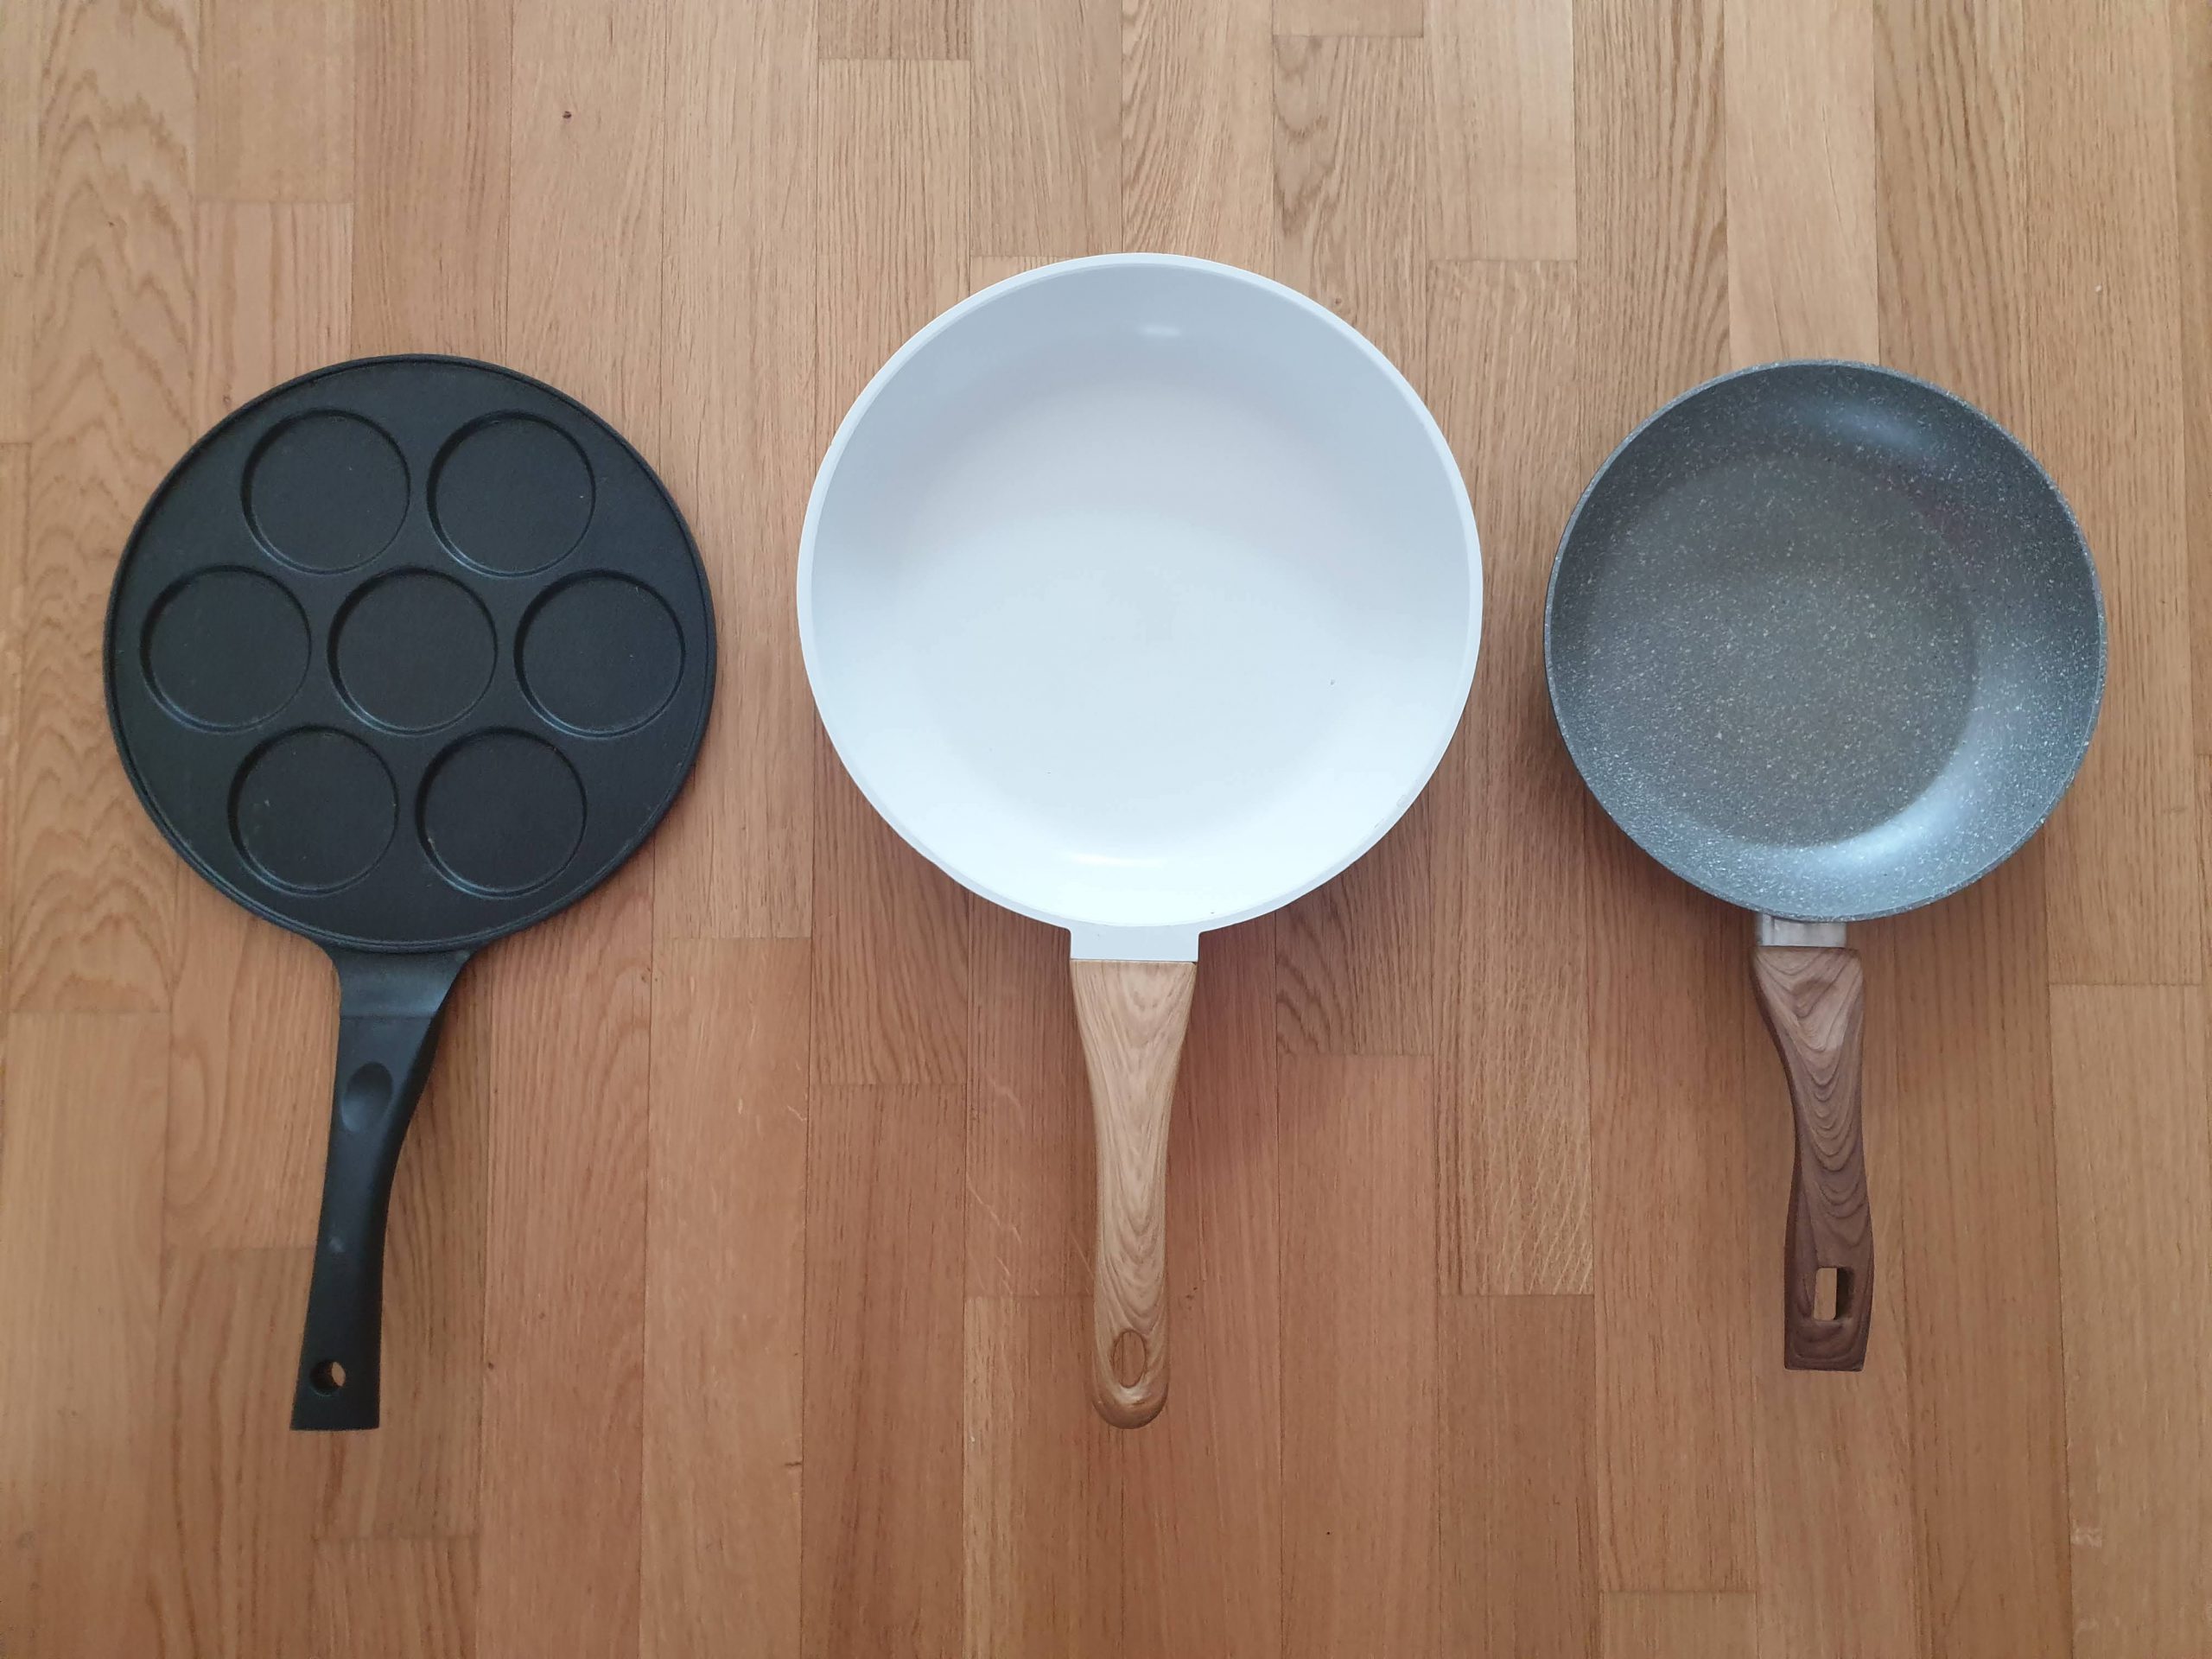
Now comes the tricky part. You want the pancakes to be brown but not too brown, cooked, but not too cooked. I have made these on a small pan, large pan, and one with mini pancake holes. The latter one was by far the easiest to not overcook things. I have made them on a regular stove and induction stove and nearly burned them on both. On both I first melted either butter or coconut oil on slightly higher than medium heat, before adding the batter, then covered with a top, reduced the heat to medium, and let it cook for a few minutes until the top is somewhat solid. If you wait too long to flip them, they will be very dark.
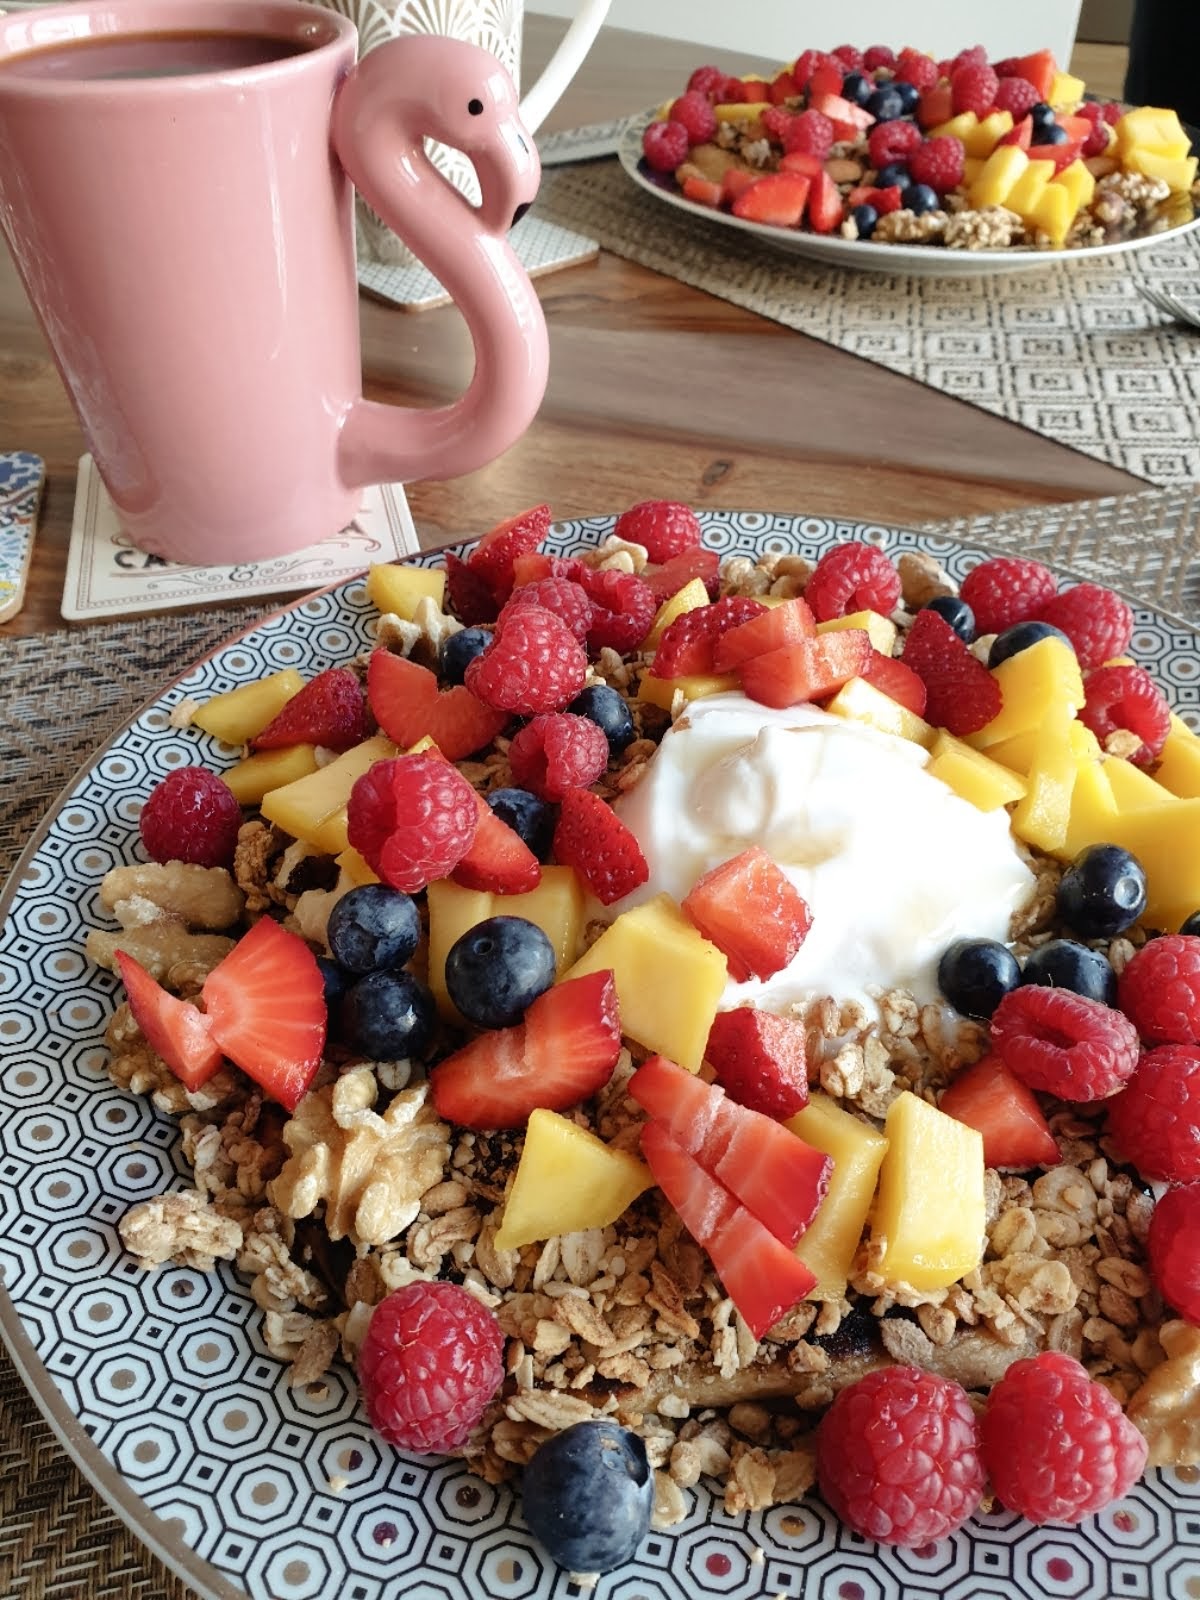
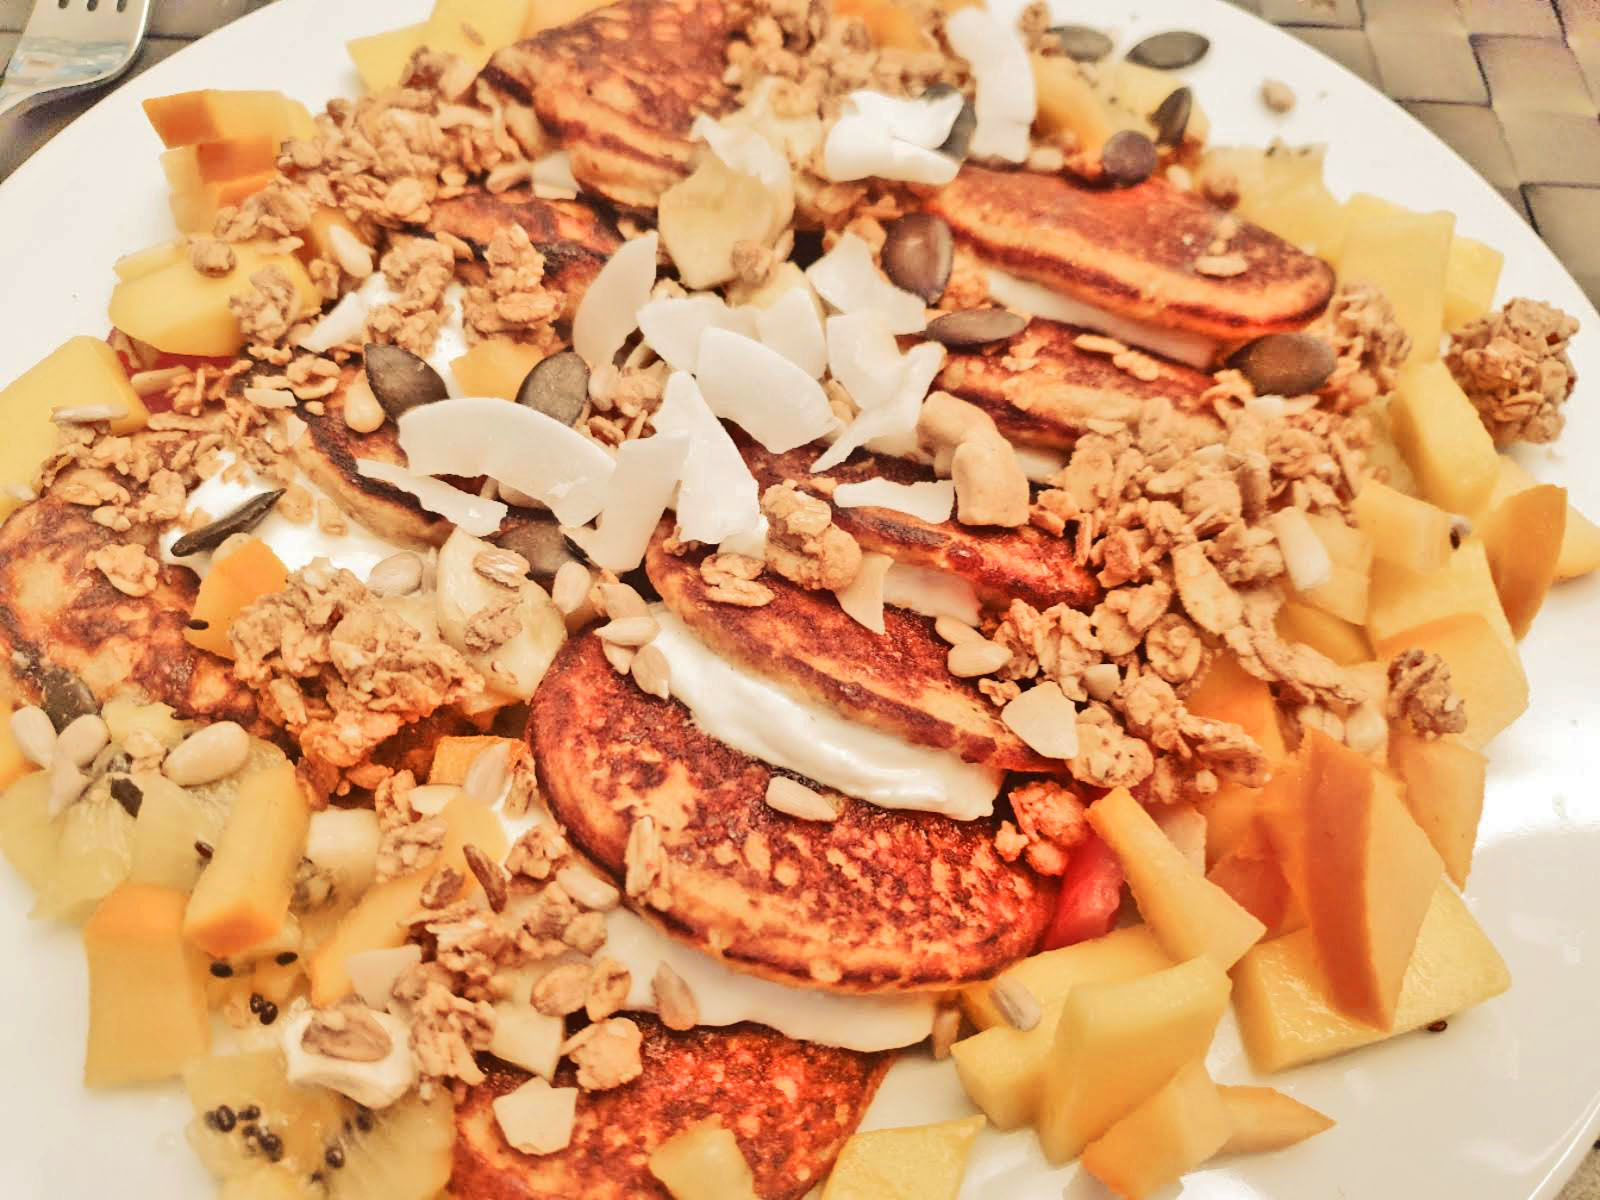
Now, here is the deal: you MUST cover them with tons of fruit and granola. It just makes them extra awesome. The great thing is, even if you didn't manage to flip them before they turn a bit too dark (like me many times), if you cover them with all sorts of toppings, nobody will notice! As long as you didn't let them get charcoil black, they will just taste a bit more toasty. I usually take a big spoon of yoghurt, put it in the middle of the pancake, drizzle with honey, and cover in fruit and granola, leaving just a bit of yoghurt to show in the middle (as you can see in the above picture). If you make many small ones, you can put a bit of yoghurt in between each piece, as below. Mangos, berries, apples all work super well.
Notes
Look at this beauty, so nice and covered in toppings. Do as I say and I do and cover them, too!I’ve tried making them on these pans, all works. The batter will be pretty thick, so even if you have a big pan, you can put some badder in the middle and ladle on more batter on top, so that it doesn’t cover the full pan. I love the small ones most though. *Note on Medjool datesBecause I know you might ask: no, it won’t be the same if you subsitute with normal dates. If you want to add a caramelly sweetness to your pancakes, find yourself some medjool dates. Otherwise leave them out (I made them without for years, before I discovered this was the secret ingredient of the pancakes at Brunch & Cake!).
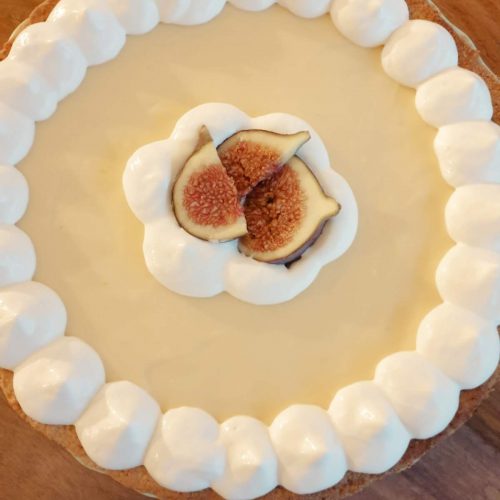
My version of the typical French Tarte Meringuée au Citron, with a sort-a healthy crust and added mascarpone. Basically what would happen, if a French, an Italian, and a hipster decide to go on a baking adventure together. Please note that the hipster is outnumbered, so clearly we are still talking lots of sugar and butter, which is indispensable to make this tart amazing!
125ggrated butterWhen it's hard, right out of the fridge or even freezer, grate it using the larger side of the grater
80gsugar
1egg yolk
1tsplemon zest
pinchof salt
Filling
150mllemon juicefrom 3-4 medium lemons, depending on how lemon-y you would like the filling.
1tsplemon zest
120gsugar
4egg yolk
1tbspMaizena
75gbutter
250gmascarpone
Topping
5egg whites
75gpowdered sugar
Instructions
Heat oven to 180°C
To make the shortbread
Whisk the egg yolk with the sugar until creamy. Now add the rest of the ingredients and quickly knead it to a smooth dough. Ideally let it cool for 30 minutes in the fridge (though I have skipped this step before and it was fine)
Place the mixture into a tart tin and bake it for 10-15 minutes, until the sides are golden. Then take it out and let it cool completely.
To make the filling
Heat lemon juice and zest in a small pot to boil. Then reduce the heat to medium.
Meanwhile, mix egg yolks, sugar, and maizena
Add two tablespoons of the hot lemon juice to the egg yolk mixture and whisk consistently until it is well incorporated
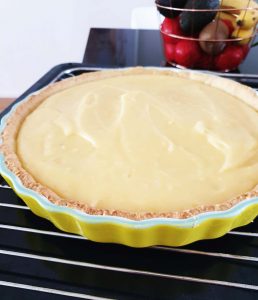
Now add this back to the pot with lemon juice, while keeping it on low-medium and keep whisking. This is the most "technical" part of the recipe: you need to have faith in yourself and just keep and keep whisking until the mixture thickens, which can take 5 minutes. It will turn from boring liquid to beauuutiful and creamy.
Once it has reached the beautiful creaminess, take it off the stove and let it cool for a bit, around 5 minutes. Then add the butter and whisk whisk whisk until incorporated and even more beautiful. If you want the true French version of this recipe, you stop here. If you want my version of the recipe, let it cool for another 5 minutes, before adding the mascarpone and whisk whisk whisk until you have the queen of creamy fillings, like an elegant and slightly rebellious marriage of a French queen and her handsome Italian knight. Just imagine a French version of Downton Abbey. 🙂
Add the mixture to the cooled shortbread and put it into the fridge for a few hours to cool.
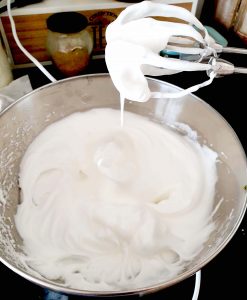
To make the topping
Whisk the egg whites and powdered sugar until stiff, around 3-5 minutes, then spread it on the cake with whatever design you wish. You can use a kitchen torch to burn the ends a bit, if you would like to make it properly French.
Last, but not least, watch a loved one devour half the tart in one go and pat yourself on the back for a job well done. 🙂
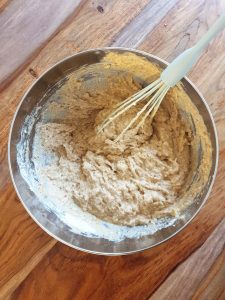
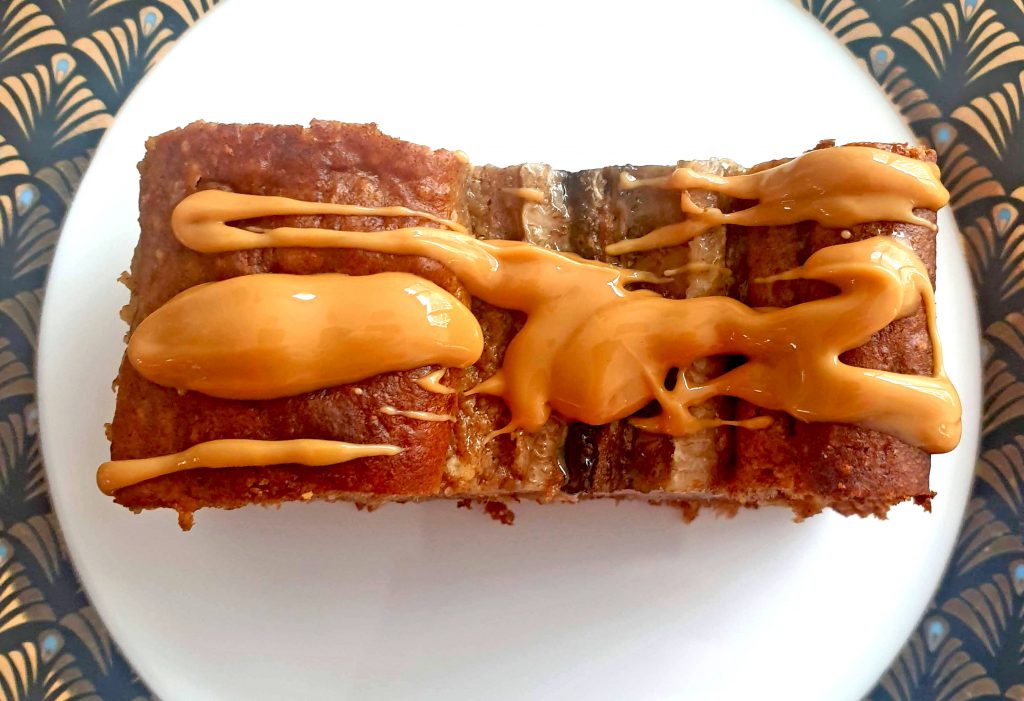
I made many, many, many banana breads in my life and after many, many, many years of recipe trials, I almost gave up on them. They were usually too sweet, too banana-y, too fluffy, too meh. But THEN I came across a key ingredient that changed the banana-game entirely: Medjool dates. They add a caramel-ly density to the banana bread that is simply amazing. So, ladies and gents, I present you the queen of banana breads. It is boyfriend approved. If you want a healthy, sugar-free, sweet, moist, dense, beautiful banana bread, this is it.
2very ripe bananas + 1 for the top (optional)the more ripe, the sweeter the bread. Too yellow, let alone green bananas are a no-go.
1egg + 1 egg yolk, beaten
3/4cupcoconut flouryou can use coconut flakes and shred them
1/4cupground oatsor porridge. I use this porridge: https://www.mueller.de/p/bio-primo-porridge-fruechte-830895/
1cupwhole wheat flourI use rye, but other whole wheat will do
1tspbaking powder
1tspbaking soda
250mlplain yoghurtButtermilk works as well
1tspground cinnamon
1/2tspground nutmeg
1tspvanilla sugar or extract
1/3cupcoconut oil
1tbsppeanut butterYou want the good kind, without the added sugars. Pure peanuts!
1/2cupfinely chopped nuts (optional)
pinchsalt
Instructions
Place the dates into a bowl with the buttermilk and let them soak for 10ish minutes
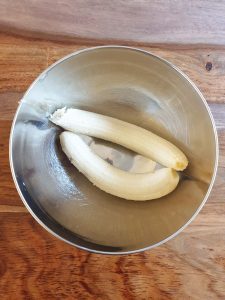
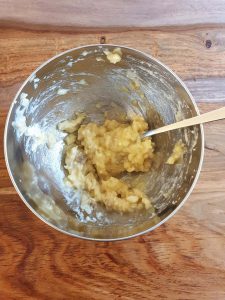
Get two of the bananas and a bowl…
…and have some fun mashing them until they look like this.
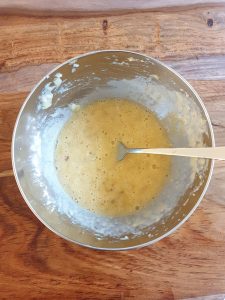
Next, add the eggs and vanilla and mix well.
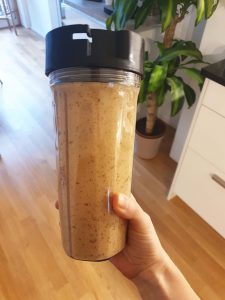
Process the dates with the milk and peanut butter in a blender until smooth (until there are no more visible chunks of dates).
Combine the flours, baking powder, baking soda, salt, cinnamon, nutmeg and coconut oil. Use a hand mixer on low spead until the coconut oil is well incorporated. Then add the milk and banana mixtures and continue mixing for a few minutes.
Now preheat the oven to 180°C.
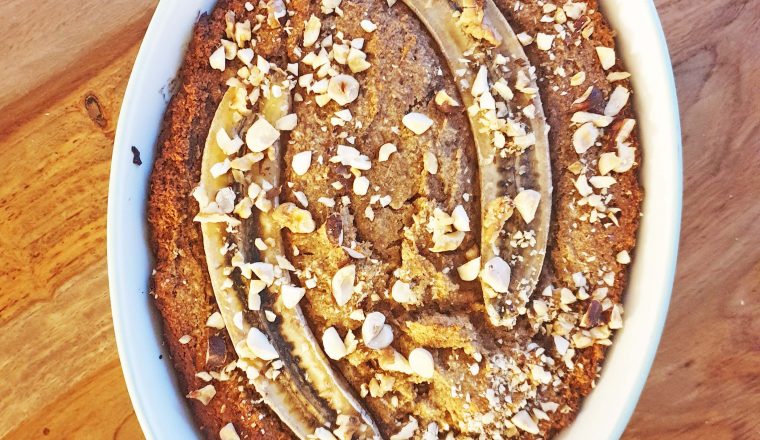
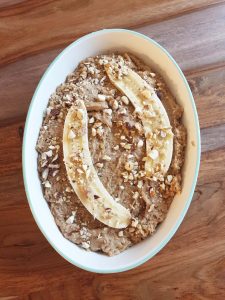
Transfer the batter to a pan (coat the pan with cooking spray or coconut oil before). Then slice the remaining banana in half and place it on top.
If you like, sprinkle the chopped nuts around the bananas. Let it sit for at least 10 minutes, while the oven is heating up.
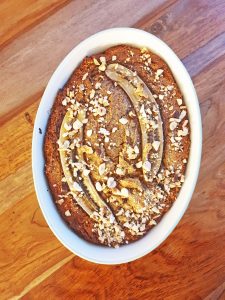
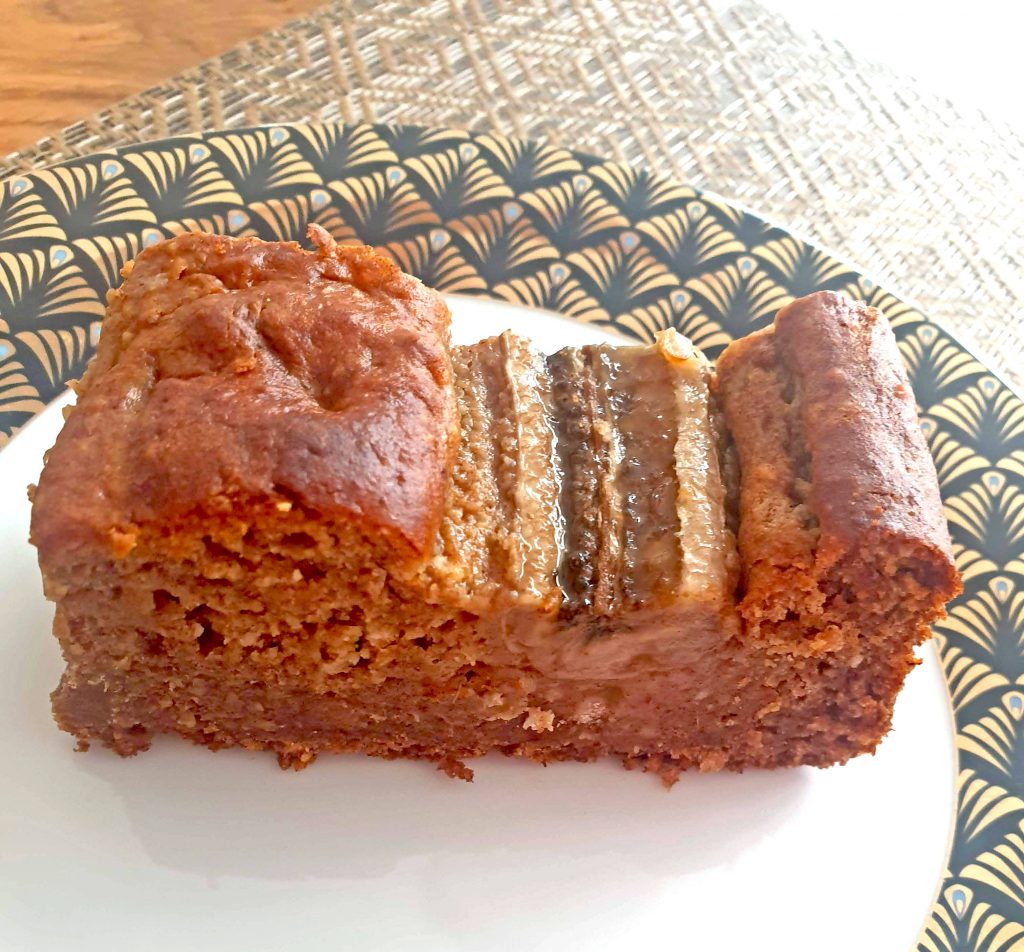
Bake for 10 minutes uncovered, then cover with foil (so it does not get too dark) and bake another 40-50 minutes. It will be a bit hard to tell when it is ready, the first times I made it, I undercooked it. A toothpick inserted in the center should come out clean, but the bread is quite moist either way and needs to cool down completely before eating it. It is actually best when it had time to cool in the fridge overnight.
Notes
Look at this beauty.Now go and slap some peanut butter on it and make it even more beautiful. Mjam! Enjoy!
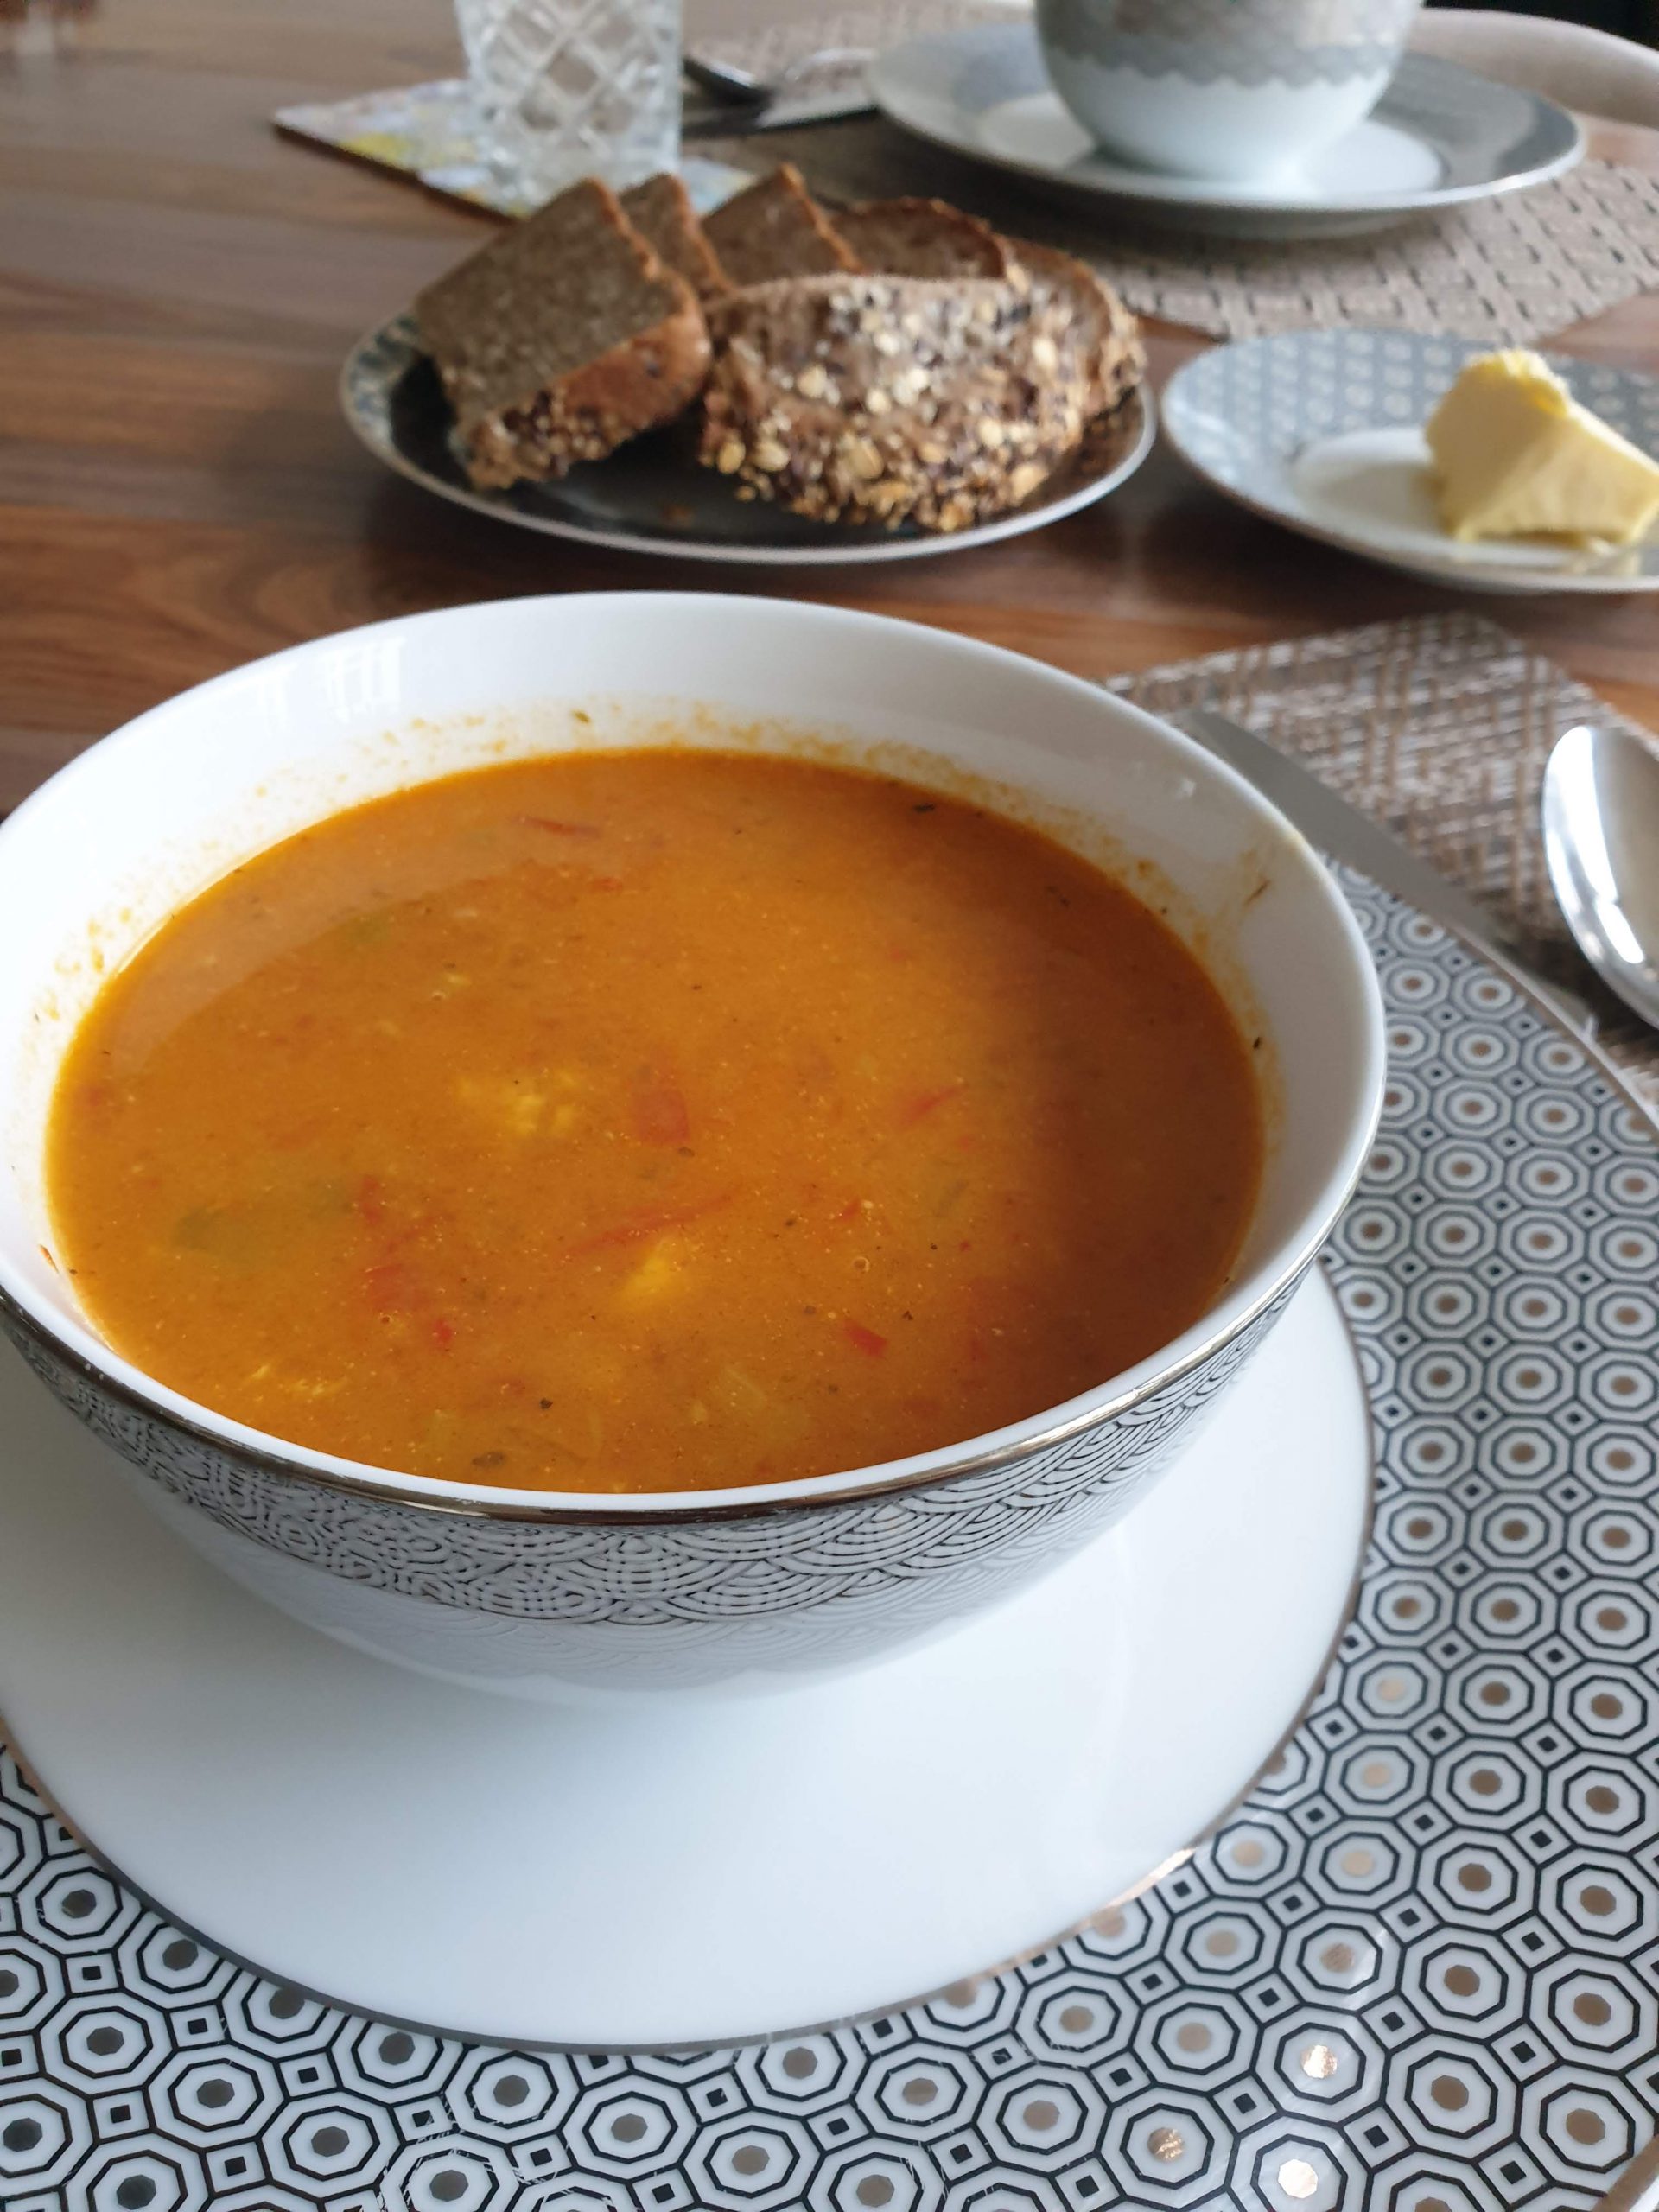
My version of a Swedish Fisksoppa, which I originally found in a restaurant in Lund called Malmstens Fisk & Kök. It is a delicious fusion of a Bouillabaisse and Curry. Read the story of how I found this soup here.
200gscallopsI really love scallops in it, but if you don't have it or it's too expensive, you can also add a boneless white fish of your choice, like cod.
200gshrimp
1large onion
1large green onion
2red peppers
4tomatoes
1cupwhite winee.g. Chardonnay
3cupsfish stockI use 2 cubes of Knorr's Caldo de Marisco boullion to make the stock. Make sure to use something of good quality, as this will make a big difference in the taste of the soup.
1cupcoconut milk
2clovesgarlic
1tspcurry powder
1tspsaffronmake sure to get the real stuff – no powder!
1tspHerbes de Provence
1tspchilli spiceadd more, if you like it spicier
2tbspolive oil
pinch of lemon juice
Instructions
Sautée onion and green onion in oil until golden.
Add peppers and garlic, sautée.
Add tomatoes, saffron, curry, chilli, and herbes de provence, mix well.
Add wine and let simmer a bit until it is reduced, then add the fish stock and let it simmer for 20 minutes.
Use a blender to purée the soup a bit at this point – it should still have chunks in it, so just use a few pulses.
Add the coconut milk, a bit of lemon juice and the fish/seafood and let it simmer another 15-20 minutes.
Notes
Best served with fresh warm bread and butter — in Switzerland, Migros sells a vegan coconut butter, which is amazing with this soup, but normal butter will do as well. I have never made my own fish stock, but find the Knorr version to be perfectly sufficient. In Switzerland, you cannot find this in the regular stores though (sadly). I usually buy it, when I am in Spain. However, I recently found it on Galaxus.